



Drywall damage is something almost every homeowner deals with at some point. Small holes, cracks, dents, or nail pops can appear over time due to daily wear, furniture movement, or natural settling of the house.
The good news is that most minor drywall issues can be repaired without professional help. With the right tools, patience, and technique, you can restore your walls to a smooth, clean finish.
This guide walks you through simple DIY drywall repair steps so you can fix common issues confidently and effectively.
Understanding Common Drywall Damage
Before starting any repair, it’s important to identify the type of damage you are dealing with. Different problems require slightly different repair approaches.
Small nail holes are the easiest to fix and usually occur after removing wall hangings. Hairline cracks often appear due to house settling or temperature changes.
Larger holes may be caused by accidental impact, such as doorknobs hitting the wall. In some cases, water damage can also weaken drywall and require more careful repair.
Knowing the type of damage helps you choose the right method and materials for a long-lasting fix.
Tools and Materials You Will Need
A successful drywall repair starts with having the right tools ready before you begin. Most DIY repairs require basic and affordable materials.
You will typically need joint compound, a putty knife, sandpaper, a utility knife, and drywall patch material for larger holes.
For cracks or deeper damage, you may also need mesh tape or backing support. Having everything prepared in advance makes the process smoother and more efficient.
Step 1: Preparing the Damaged Area
The first step in any drywall repair is proper preparation. Start by cleaning the damaged area and removing any loose debris, paint chips, or crumbling drywall.
Use a utility knife to slightly widen cracks or holes if needed. This may seem counterintuitive, but it helps the joint compound adhere better.
A clean and stable surface ensures that the repair material bonds properly and lasts longer without cracking again.
Step 2: Applying a Patch for Larger Holes
For small holes, a simple fill with joint compound may be enough. However, larger holes require a patch for proper support.
Cut a drywall patch slightly larger than the damaged area and secure it in place. This provides a stable base for applying compound over it.
Once the patch is secured, you can begin layering joint compound over it to blend it into the surrounding wall.
Step 3: Filling the Damage with Joint Compound
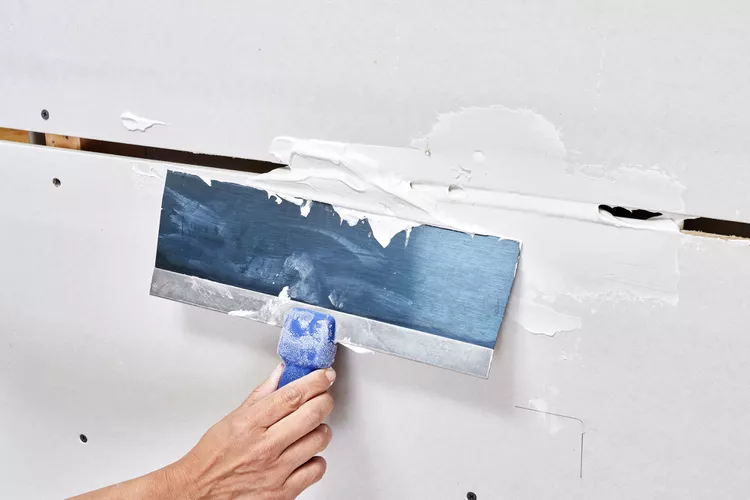
Joint compound, also known as “mud,” is the key material used in drywall repair. Apply it using a putty knife in thin, even layers.
The goal is not to cover everything in one thick coat but to gradually build up the surface. This helps prevent cracking and ensures a smooth finish.
Allow each layer to dry completely before applying the next one for best results.
Step 4: Using Drywall Tape for Cracks
For cracks, especially longer ones, drywall tape is essential for reinforcement. It helps hold the surface together and prevents the crack from returning.
Apply a thin layer of joint compound over the crack, then press the tape into it firmly. Smooth it out to remove air bubbles and excess compound.
Once dry, apply another layer of compound over the tape to fully seal and blend it into the wall.
Step 5: Sanding for a Smooth Finish
Sanding is one of the most important steps in achieving a professional-looking repair. Once the compound is fully dry, use fine-grit sandpaper to smooth the surface.
Be careful not to sand too aggressively, as this can damage the repair or expose the tape underneath.
The goal is to create a seamless transition between the repaired area and the surrounding wall.
Step 6: Applying Final Touches
After sanding, inspect the area under good lighting to check for imperfections. Small dents or uneven spots can be fixed with a thin additional coat of compound.
Once satisfied with the smoothness, the area is ready for priming and painting. Matching the paint carefully ensures the repair becomes nearly invisible.
A well-finished repair should blend seamlessly with the rest of the wall.
Common DIY Mistakes to Avoid
Many DIY drywall repairs fail due to simple mistakes that can be avoided with care.
One common issue is applying too much compound at once. Thick layers take longer to dry and often result in cracks or uneven surfaces.
Another mistake is skipping sanding or rushing through it, which leaves visible bumps or ridges after painting.
Not allowing enough drying time between layers can also weaken the repair and reduce durability.
When DIY Is Not Enough
While DIY repairs work well for small issues, some situations require professional attention.
Large holes, recurring cracks, or water-damaged drywall may indicate deeper structural problems. In such cases, a simple patch may not solve the issue long-term.
If you notice that damage keeps returning or spreading, it may be time to call experts for a proper inspection and repair.
Working with a professional service like a trusted HomeDrywall Expert ensures that underlying issues are properly diagnosed and fixed.
Benefits of DIY Drywall Repair
DIY drywall repair offers several advantages for homeowners. It is cost-effective, convenient, and allows you to fix small issues quickly without waiting for professional scheduling.
It also helps you understand your home better and maintain it proactively. With a bit of practice, many minor repairs become easy and routine tasks.
However, knowing your limits is important to avoid making the damage worse.
Professional Help for Long-Term Results
While DIY methods are useful, professional repair services provide long-lasting and flawless results, especially for larger or more complex damage.
Experts use advanced tools and techniques to ensure smooth finishes that blend perfectly with existing walls.
For reliable and durable repairs, using a professional drywall repair service can save time and prevent future issues.
Maintenance Tips After Repair
Once your drywall is repaired and painted, simple maintenance can help keep it in good condition.
Avoid hanging heavy objects without proper anchors, as this can create new damage. Keep indoor humidity levels stable to prevent cracking or expansion.
Regularly inspect walls for small issues so they can be fixed early before becoming bigger problems.
DIY drywall repair is a practical skill that every homeowner can learn. With the right tools and techniques, small holes, cracks, and dents can be fixed easily and effectively.
While DIY solutions work well for minor damage, understanding when to seek professional help is equally important for maintaining long-term wall quality.
By combining careful repair work with proper maintenance, you can keep your walls smooth, strong, and visually appealing for years to come.

Leave a Reply